Friday, December 16, 2011

Ugly Christmas Sweater

Yesterday I decided I needed a Christmas gift for a family we know, so I thought an ornament might be a good idea. 

As I searched through the Ravelry pattern database looking for something to inspire me, it occurred to me that an Ugly Christmas Sweater would make a fantastic ornament. 

I was right.


I'm not publishing an official pattern, but I am happy to share the charts and the general process for anyone who wants to make their own Ugly Christmas Sweater ornament.

I used Knit Picks Palette but any fingering weight yarn would work (I bought the original complete set of 30 balls when it first came out, so I had all the colors on hand),  I used size 2 needles, which gave me a gauge of 7.5 sts/in. The final measurements are about 3" across the sweater body (not including sleeves) and 3.75" in length.


Click on the image to embiggen.
Gray boxes indicate "no stitch," which means CO 22 sts, then inc 1 st in Row 4. At the top, they show where the neck bind off occurs and additional rows are worked for each shoulder.

Black dots represent purl sts (i.e. first 2 rows are k1p1 ribbing)
Single squares of color (like for eyes or buttons or nose) indicate French Knot. 

I knit the front and the back, using the intarsia technique, although I did strand the white across the back of the tree trunk and the star, since they were so small.  Later, I added French Knots for the snowman's eyes and buttons, as well as the reindeer's eyes and nose.  I knit in the reindeer's head, but used duplicate stitch to add the antlers.


I left the shoulder sts live for the front and back and joined using a 3-needle bind off.  I picked up the sts for the sleeves and knit down to the cuff.  For the sleeve with the snowflakes, I knit it all in green and embroidered them on later.  The snowman's arms were embroidered using outline stitch.


For the tree, I had some stretchy silver beading thread  that I used to string the "lights" and the tinsel was silver metallic embroidery floss, which was a real pain in the rear to work with.  Oh, and I added some fringe to the snowman's scarf with short lengths of the green yarn and I embroidered a carrot nose, too.


I did all the embellishing and wove in ends before doing the seaming.


I seamed using mattress stitch (just a 1/2 st each side for the sleeves, but a full stitch each side for the body).


I didn't bother picking up sts and knitting a ribbed neck, although I originally planned to.


Tuesday, December 13, 2011

Happy Birthday, Mother!

Today is my mother's 74th birthday, and I'm hoping that the package I mailed out to her on Saturday hits her doorstep today.

This fall I've been knitting a lot of things of my own design. Some have been relatively mindless knits, and can hardly be called "designs," like the plain stockinette socks I made for my daughter and her boyfriend (no, they aren't matching pairs, although the socks within each pair match, because I'm one of Those Knitters).

I'm back to working on Michael's Aran sweater that is part of my Level III work for the Master Hand knitting program.

I've done a lot of swatching of stranded designs for the Fair Isle hat (also for the MHK program), and have finally come up with a set of stitch patterns Sophia likes that I will turn into a hat, possibly over winter break.

I designed a shawlette pattern that I quite like (still not sick of it after knitting it three times) and it is currently with test knitters.

There was a cabled earflap hat of someone else's design that I completely re-engineered.

The package my mother will receive today (I hope!) was one of the few items I knit this fall that was not of my own design or heavily modified.


 My mother had back surgery in September and has been recovering well.  The pain meds have dampened her appetite and she still isn't very mobile, so she's been complaining about being cold.  Back pain means that it's a big deal for her to put on clothes and take them off, so I wanted to make her a shawl that would be easy for her to put around her shoulders if she needed some extra warmth and would stay put, even when she got up and moved around. This is especially important, because a couple of weeks ago she fell and broke a vertebra above the ones that were plated and pinned and screwed together in September.  She's going to be encased in what she describes as an "Iron Man suit" for the next month.

The pattern is Fundamentally Faroese, by Cheryl Oberle, and is knit bottom-up. What I like about Faroese shawls is that they are structured so that they stay on the shoulders.  When blocked and finished, the upper edge curves where it will lie across the shoulders.  The day after I finished it, I wore it all day, including while teaching, just to make sure I didn't need a shawl pin.  It stayed on my shoulders, no problem, never once slipping off.

The yarn is a handpainted, 2-ply DK from Rovings and is 70% Polwarth wool and 30% mohair.  I got this yarn from a Canadian vendor at Yarn Over a few years ago.  It has a gorgeous sheen and a wonderful halo. 

If this shawl wasn't intended for my mother, I don't think I'd have the strength to give it away.

Wednesday, November 02, 2011

Designing a Hat

I've finished my Level III swatches and I'm moving on to other parts.  I designed the Aran sweater this past summer and knit the back, without knowing for sure what the requirements were. I had a fairly good idea of what they were, plus I've knit several Aran sweaters, but I put it aside to rest after finishing the back, just in case there was a problem. 

I've been doing research on the two traditional knitting styles I'll write about for one of my reports, and since one of those is an Aran sweater, I thought I would let the sweater marinate a little longer while I dig into the history and traditions of the Aran sweater.

Meanwhile, I've been pondering my Fair Isle hat design.  Originally, I intended to knit a tam, but I do like to make projects for the MHK program that can be used later, if at all possible, so when Sophia mentioned she would like a hat with ear flaps, I reconsidered my hat style choice.

In my mind I could see a Chullu-esqe hat, with earflaps that were double-sided, to be warmer and to lie flat. (Either knit in the round, or double knit, although with double knitting I would have to contend with a difference in gauge and also, I kind of hate my selvedges in double knitting.)  I want the transition from main body of hat down to the flap to be continuous, and I don't want to have to sew anything.  I wasn't sure what to do about the hat cuff: ribbed, or hemmed, or straight stockinette with applied i-cord around the edges of the cuff and earflaps...

First, though, I needed some measurements.  That's not what I did first, but it is what I needed to do first.  No, first what I did was to wing it. 

I searched around online and found that ear flaps are not centered at the 1/4 and 3/4 points of the round (assuming the round begins at the back of the head).  They are actually set further back, so that one flap sits entirely within the first 1/4 of the round and the other entirely within the last 1/4 of the round.  Someone mentioned that the midpoint of one ear flap, running around the back of the head to the other flap midpoint was about 1/3 of the circumference. 

Knowing Sophia's head size, I calculated the flap positions and decided a 3 1/2" flap would be good.  I "knew" that my gauge on size 5 needles using worsted weight yarn would be 5.5 sts/in, so I calculated stitch counts, and cast on. 

After several problems with third grade arithmetic in which I decided that 37+37+56=110 (Hint: it does not), which was followed by deciding that the ear flaps needed to be moved even further back (Hint: they did not), I took the incredible step of actually measuring Sophia's head to find out where her actual ears were situated on her actual head, and then to take a second measurement in which I determined the correct ear flap width would actually be better at 3" and THEN I measured my stitch gauge and discovered I was knitting a bit looser than I anticipated, which meant that in addition to placing the too-large earflaps too far back on the hat, the hat was too big.

You can see now how it is that I am this close to becoming a master knitter!


Here's my revised plan for ear flap placement and stitch counts.
Circled numbers on right indicate stitch counts
While struggling with arithmetic, I did manage to come up with a good idea for how to work the ear flaps into the hemmed edge.

It occurred to me I could use a trick I thought of a few years ago, when making mittens with peasant thumbs.  There are a couple of techniques typically used in that scenario.  One is to knit the stitches where the thumb will be with waste yarn, return the waste yarn knit sts back to the left needle, then knit them again with the main yarn.  Later, the stitches above and below the waste yarn can be put on dpns, the waste yarn can be removed and the thumb can be worked in the round, using those live sts.

Another technique is to bind off the stitches where the thumb will occur, and then on the next round, cast on that same number, basically creating a button hole.  Stitches are picked up around the hole and the thumb is knit.  This creates an edge inside the thumb where the cast on and bind off sts were, but having the hole there as the mitten is knit allows the mitten to be tried on, so that you can be sure of how it is fitting and when to do the top decreases.

A third technique is a hybrid, which is to place the sts on waste yarn (threading waste yarn through the sts, rather than knitting them with waste yarn), and then casting on over these stitches on the same round.  When picking up sts later, you have a ridge only along the cast on edge.

My method, I think, gives the best of both worlds: it provides the thumb hole, so the mitten can be tried on as it's knit, but it leaves no edge inside the thumb when stitches are picked up.

It goes like this: slip the stitches onto waste yarn, and leave an extra long tail at the end of the held sts where the working yarn is hanging.  Now cast on with the LT cast on, using the waste yarn tail as the thumb yarn and the working yarn for the index finger yarn.  This creates a provisional cast on edge.  When it's time to put the stitches back on needles, the cast on edge has to be picked out, but you're left with live stitches.

So that's my idea for the hemmed hat as well.  On the purled turning round, when I get to the stitches where the ear flap will be, I put the number of stitches the ear flap will span on waste yarn, and then I cast on that number of sts, using the waste yarn tail and the working yarn, then I continue purling the round until I get to the next ear flap location.

Waste yarn holds sts resting on thumb and is used to cast on new sts.


Round is complete. That hole will become the live sts needed to knit the earflaps top down.
Hem is fused.  Earflap holes are ready.

Monday, October 10, 2011

Master Knitting - Level III Begins

I sent my re-submits for Level II a few days after I had received my initial review from the committee, and on Saturday, Oct. 1, I received notification that I had passed Level II.  Yay!

In her email to me, the co-chair who reviewed my work said the following:
I said in my letter that it was truly a pleasure to review your work.  And, I want you to know that I mean that.  Yours was by far one of the best Level 2 submissions I have seen as a Co-Chair.  The quality of your knitting, the quality of your written work, and your commitment to the program is outstanding.  You are “oh so close” to being a Master Knitter!
I'm still glowing from the praise!

I promptly ordered my Level III materials, but it took a few days to receive them.  I dove right in and have already knit quite a few of the 19 swatches and answered many of the questions.

Having just come off Level II, I'm very conscious of how to write the swatch instructions and the importance of writing them while I knit them!  For me, the hardest thing about writing the instructions is not being allowed to use photos or videos for steps that are particularly fiddly, tricky, or unusual.  The Twisted German cast on and the closed circular cast on are not easy to explain with just words!

My goal is to submit my binder by March 24, which is my 50th birthday.  I'm confident I can do it!

Sunday, September 25, 2011

Master Knitting Update

I sent off my Level 2 binder for the Master Hand Knitting program at the end of July.  Yesterday morning, I received it back, along with a letter from the co-chair of the committee who reviewed it. (Level 2 is reviewed by two committee members and a co-chair.)

I am happy to say I have no knitting re-submits to do.  My knitting book reviews were all accepted, as was my History of Knitting report.  Overall, they were very complimentary about my submission, and told me it was "one of the most skilled Level 2 submissions that we have seen." 

Resubmits consist of the following
  • Patterns for three swatches: one lace swatch, one cable swatch and the cable flare swatch.  
  • Gauge worksheet and answer for Question 8. 
  • Question 12 was accepted, but clarification was requested.
  • Question 14: "Your discussion is excellent." Please resubmit paragraph with directions for swatch.

They also suggested I submit a pattern for the vest I knit, even though it's not a requirement for Level 2.  I had made extreme modifications to the vest pattern.  The only things I actually used from it were the dimensions and stitch gauge.  The original pattern was a two-color  stranded design knit in the round with steeks.  My vest was knit flat and seamed and had a cable-lace pattern in the front.  I had thought I might need to write the pattern, and did about it at the Knit and Crochet Show.  At the time I was told it wasn't necessary (and they're still saying that), but they're recommending I do so because it'll be good practice for Level 3.  I'd just as soon get feedback now on my garment pattern writing skills, since it's clear I need some work on my swatch pattern writing!

On the whole, I'm very happy.  Level 2 was a LOT of work and I'm glad there are so few re-submits.  This means I will be able to jump into Level 3 very soon!

Wednesday, August 31, 2011

More news on the knitting class front

I forgot to mention the other day that I will continue to offer monthly clinics for people working through the Master Hand Knitting program.  These clinics are a way for knitters to get support for their work, to set monthly goals (if that helps them), and to learn techniques in the program they may not have known previously. 

During the fall, I offer these clinics on the third Saturday of the month from noon-2pm.  The rest of the year, they're on the 4th Saturday.  That seems to work out best for avoiding major holidays.

The Master Hand Knitting program is a three-level correspondence course offered by The Knitting Guild Association (TKGA).  It's an educational program, and the time to complete any given level is unlimited.  Each level consists of swatches that demonstrate particular techniques (with questions associated with the swatches and techniques), reports and/or reviews, as well as projects.  Design and pattern writing is also covered.  As you complete each level, you send it in to a committee who reviews your work and then each swatch/project/question/report/pattern is reviewed and is either accepted, or subject to resubmission.  Once everything has been accepted, and you've passed the level, you can get the instructions for the next level.  You can find out more about the program on TKGA's website.  The Education menu has a link to the Master's Program page.


I have found the program to be an invaluable learning experience.  It's not for everyone, and not everyone who starts with Level I will want to see the whole program through to the end.  Whether your goal is to simply be a better knitter, or to be able to design your own garments (to sell patterns or not), or because you have an obsessive need to learn all about something that your enjoy doing, you may find the program fits with your goals as a knitter.


Saturday, August 27, 2011

Fall Project Classes

In addition to beginning knitting, intermediate classes, techniques classes, and Thursday night clinics, which I announced in my last blog entry, I'll be teaching several project classes this fall at Needlework Unlimited.  You can sign up directly online, in person, or by calling the shop.

Cookie A Sock Club
BFF - a Sept/Oct Sock Club Selection
I love Cookie A's sock patterns and I'm not alone.  Thousands of knitters have bought her two sock books, Sock Innovation and knit.sock.love.  If you're one of those knitters who have her books (or want them), but haven't gotten up the nerve to actually knit any of the patterns, the Cookie A sock club might be just the thing you need to get started on Cookie's fantastic, well-written patterns.

For each class, I've chosen two sock patterns that are similar in their construction or their nature, with one sock pattern being easier and the other being more of a challenge. Each student selects the sock that suits his or her level of adventure.

For all the socks, we'll talk about re-sizing options and other fit considerations, plus tips and tricks for getting the best finished results.

For the Sept/Oct sock club I've chosen socks where the pattern is set up in columns of cable patterns.  The easier sock (and probably the easiest Cookie A pattern of all) is BFF, which has columns of 4-st rope cables.
Marilinda, the more challenging
Sept/Oct Sock Club Selection

BFF is easy to size up or down, and isn't too much of a step beyond a plain sock.  If you've never tried cables, or reading a chart, or just haven't tried knitting with finer sock yarn, this might be the sock for you.

The more challenging sock is Marilinda.  This sock also has columns of the repeating stitch pattern, but the number of stitches and rows in the repeat is greater, and includes several different techniques.  Amongst those techniques is the exact same cable crossing the BFF sock has, but also a faux traveling cable as well as a Japanese faux cable.  This sock also continues the stitch pattern down the back of the heel.

Both patterns for the Sept/Oct sock club are in Cookie's newest book, knit.sock.love.

Foot detail of Kai-Mei
November's sock club features one sock from knit.sock.love and the other from her first book, Sock Innovation.  These socks are both asymmetrical (there's a right sock and a left sock), with the pattern traveling across the leg and/or foot.

Pointelle, the November Sock Club
challenging sock

The easier sock is Kai-Mei, from Sock Innovation.  This sock has a plain, ribbed leg, and then the magic occurs when a simple, but unusual and beautiful pattern travels from the outer ankle across the instep.

Pointelle, from knit.sock.love is the more challenging sock for the November sock club.  The pattern travels down and across the leg and the foot, using a more intricate lace pattern than Kai-Mei.


But wait, there's more!

In addition to the sock club classes, I'll be teaching three project classes from another favorite designer of mine: Ysolda Teague.

There's a hat, a scarf and fingerless mitts, all from Ysolda's Whimsical Little Knits Two.  These projects all include techniques that are not typical in hats, scarves and mitts, making them much more interesting to knit for those who have knit these types of projects in the traditional manner.  It's great to learn new techniques on small projects.  Plus, any of these would make great holiday gifts!

Kicking off the Ysolda love-fest is a two-week class for the  Scroll Lace Scarf, which I'll teach Saturdays, Sept 17 and 24, 10 am-noon.  This is the least boring scarf I've ever knit--it's no 6-foot long rectangle!  There's a provisional cast on, and a  lace pattern that is simple enough for first-time lace knitters, but not boring for those who are more experienced.

Stitches are picked up for the body of the scarf, with short rows worked to create the depth at the center.  The short row technique I'll teach is a German method (no wraps!) that gives the same result as Japanese short rows without all the pins hanging off the back of the work.  Finally, there's a picot bind off that complements the larger picot look of the lace edge.  Lots of great techniques packed into one great little scarf!

We'll also discuss how to block the scarf to open up the lace and get the best finished result.

Shorter version of Ripley
with the lace band.
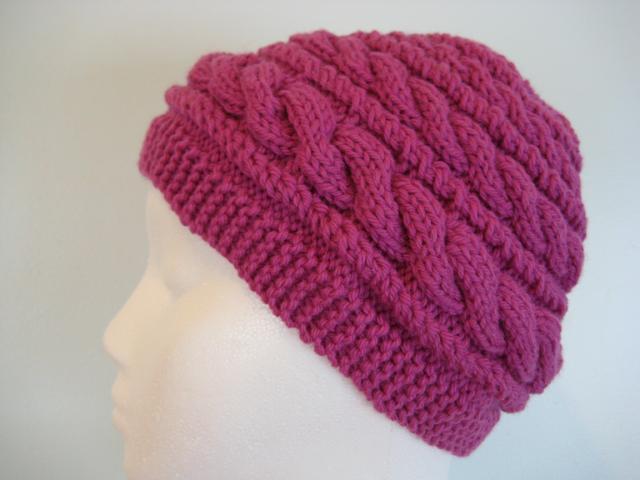
Mondays in October (the 3rd and 10th, 6-8pm), I'll be teaching the Ripley, hat.  This hat also has some great techniques, but with several options to suit your preference.  First, the band can either be simple garter or simple lace, but whichever you choose, the band is knit sideways, then grafted to form a tube.  Stitches are picked up around one edge of the tube and the hat is then knit in the round.  The gathers are done using a tuck stitch technique, and can either accent the side of the hat (for the short version) or provide support for at the back of the hat (for the longer, slouchy version) .


Saturday, Nov 5 and 12, 10 am-noon, I'll be teaching Veyla fingerless mitts.

Like Ripley and the Scroll Lace Scarf, Veyla starts with a lace strip but ends with buttonholes.  Stitches are picked up and the hand is worked in the round.  The thumb gusset increases are unusually placed YOs, and there's a final lace inset at the knuckles.  These mitts are not identical, and we will discuss the differences in the charts.  We'll also cover how to block the lace for the best finished result.

All three of the Ysolda patterns include charts for the lace.  If you are new to chart reading, this is a great way to learn how to read them!

Friday, August 26, 2011

Fall Classes

There are tons of classes scheduled for this fall at Needlework Unlimited, my neighborhood yarn shop, and the place you can usually find me teaching several times each week.

You can find out more specifics on the Needlework Unlimited website, as well as sign up online.

Classes for Beginners
If you know someone who is interested in learning to knit, I teach Knitting 101 and 102 every
month, rotating the days and times when I offer it.  Knitting 101  is two 2-hour sessions long and covers casting on, knitting, purling, and binding off, but often covers more.
Knitting 102 is one 2-hour session tailored to the students who take it, whether it's getting started on a new project, or learning more techniques.  Some students take this class several months in a row as they start new projects and need to learn new techniques.  K102 is typically scheduled a week after K101 ends.

Clinics - Thursdays 6-8 pm
I am at the shop (almost) every Thursday evening from 6-8 pm for knitting clinics.  If you're having problems with a project or want help mastering particular technique and you need some one-on-one help, this is the time to get it.  Cost is $15 for two hours.  (No clinic Sep 8 or Thanksgiving)

For students enrolled in my project classes, you can stop in for my clinic and receive extra help on the class project at no charge (while the class is still going on).

Techniques classes
These techniques are not project specific, but offer alternative methods for familiar and/or traditional techniques.

Cabling without a cable needle.  Saturday, Sept. 10, 10 am-noon
This class is for knitters already familiar with cables.  There are times when you just can't get around using a cable needle, but other times you can work cables without a cable needle.  This is particularly handy for cables and twists of just a couple of stitches that occur frequently, when a cable needle can really slow you down.  This class will teach you how to cable without a cable needle, whether you are working basic 2-stitch knit twists, knit/purl cables, or traveling (possibly twisted stitch) cables.  You'll need needles with pointy tips.

Knitting in the round without dpns. Saturday, Oct 8, noon-2 pm
Magic Loop, Traveling Loop, and Two Circs are methods of working small to medium circumference items without the need for double pointed needles.  This class will cover all three techniques, including when it's possible to use each technique, when the techniques are interchangeable and when one technique has an advantage over another.  We'll also discuss the application of these techniques for larger circumference knitting.

Continental knitting. Saturday, Nov. 19, 10 am-noon.
This class is for knitters who "throw" or "flick" the yarn with their right hand and are interested in learning to knit with the yarn in their left hand, either as a substitute for their current method of knitting, in order to manage one color of yarn in each hand for stranded color knitting, or simply to expand their repertoire.

Intermediate Knitting Techniques
I'll be offering three techniques classes aimed at knitters who want to move on to becoming intermediate knitters.  Each class meets once for two hours.

Increases and Decreases. Wednesday, Oct 12, 6-8 pm
This class will focus on various single and double increases and decreases.  Some patterns specify a particular type of increase or decrease and some leave it up to the knitter.  This class will cover not only how to do each type of increase, but when and where they are best used, allowing you to select the one that suits you and your project best, regardless of what the pattern says.

Cables and Lace. Wednesday, Oct 19, 6-8 pm
Cables and lace are among the most commonly used techniques for textured designs and run the gamut from very simple to highly complex.  This class will teach the nuts and bolts of each of these techniques, allowing you to step up the complexity of your projects with confidence.

Reading patterns and charts, Wednesday, Oct. 26, 6-8 pm
Written patterns are full of abbreviations and short hand, which can quickly get tricky if you don't understand the rules behind their structure and how to read and interpret them.  We'll cover the basics of how written patterns are set up, as well as delve into the more complex, such as the infamous "AT THE SAME TIME" instruction.

Charts can seem overwhelming until you understand that the symbols aren't random and that they can actually help you see what you're supposed to do as well as act as a way of checking your work and seeing where you're headed.  We'll discuss charts for knitting flat and in the round.

Tomorrow, I'll update you on the project classes I'm teaching.  If you can't wait, you can find information on all the fall classes at NU on their website here.

Thursday, August 25, 2011

It's State Fair Time

I love going to the Creative Activities building at the Minnesota State Fair to look at all the hand crafts, particularly the knitting.  Until a couple of years ago, I never looked into how to enter a knitted item into the competition, and certainly never planned my knitting during the year with the idea of entering the fair.


I entered one item a couple of years ago in the "vest, textured pattern" category.  I had done a very nice job on the finishing work for the vest I had knit for Level II of the Master Hand Knitting program.  I didn't win a ribbon, although I got quite a high score (in the mid 90s).  It was apparent that vests that won ribbons had texture patterns on the front and back, rather than just the front, as mine had.  The sweater categories are divided out by "limited texture" and "texture," but the vests aren't, so it worked to my disadvantage that my vest had a plain stockinette back. 

Last year I didn't get my act together in time to enter anything, but this year, I managed to look up the dates before the deadline had passed. (I really ought to put those dates in my calendar!) I had a couple of things I wanted to enter, but as I inspected the two pairs of socks that I was particularly proud of, I could see that neither pair would do, as there was obvious wear on the soles, either because of some felting on the inside of the heels in one case, or soiled soles in the other.  (Again, I don't plan ahead for fair-worthy items.  I ought to put them away until after the fair is over, but that never occurs to me.)

I decided to enter just one wee hat, and as it turned out, the competition was Garment Making, not Needlecraft, as it was an infant's hat and baby items are not part of the hand knitting categories.

This morning and afternoon, I received two separate text messages on my phone with attached photos.

Here's what my friend Rosemary sent to me.
Second Premium
Garment Making, Infant's and Toddler's garments,
Bonnet or cap, knitted


Monday, May 02, 2011

Yarn Over and the Technical Trio

Yarn Over was this past weekend, and I had a fantastic time.  I took two great classes - one from Susanna Hansson and one from Fiona Ellis and both were great.  I love to see how other teachers teach, and it's even better when I learn something new.

Perhaps the best part of the weekend was having breakfast Sunday morning with TECHknitter and Joan Schrouder.  We've been planning this breakfast for months, and I couldn't wait to lay my eyes on TECHknitter.  Who hasn't wondered about the face behind the fabulous knitting blog?

We had a fantastic time geeking out and mutually admiring each other and talking about Ravelry, which is what really brought us together.  When the waiter brought our breakfast, we asked him to take our picture.


The whole time at breakfast, I kept wondering how TECHknitter could eat breakfast with that giant black rectangle strapped across her eyes. Amazing.  Also, I could swear my cardigan was completely buttoned up when I left the house that morning.  And doesn't Joan look gorgeous in that blue shawl?

Wednesday, February 09, 2011

New Pattern, New CraftEDU Class

I've been busy lately working on a new design and new class for CraftEDU.  The pattern is also available for sale as a Ravelry download for $4.50. buy now


It's a sideways cabled hat that incorporates short rows for the shaping, plus lots of other techniques not normally found in a hat, like grafting in pattern and picking up sts.  Yarn weight and needle size allow you to size the pattern up and down.  I used Koigu KPPPM and 3.0mm needles for the baby hat in the tea cup and good old Cascade 220 and size 7/4.5mm needles for the magenta and periwinkle hats above.

There's a free Preview of the class at CraftEDU, and we're running a BAZINGA! through noon tomorrow (Mountain time) that will give you a discount off the price.  The class includes in-depth photo tutorials with lots of voice over naration, as well as video tutorials, and runs close to an hour and a half in length.  There are even tips on designing with a graft in mind!  A boatload of great techniques to learn with just one hank of yarn!

Once again, the great thing about a CraftEDU class is that you can skip the parts on techniques you already know, or watch the techniques that are new or troublesome over and over again.

I plan to offer this techniques-packed class locally, too, so stay tuned for more information.