Monday, December 24, 2007

Old Year Resolutions

First things first.

She's thirteen, as of this past Thursday. Friday, she got her braces off, which I think was almost as exciting as becoming a teenager.

She's modeling her birthday Trapper Hat (Vogue Knitting Winter 2005/2006) under the glow of the porch light, because she is also a Winter Solstice baby, which means there's not enough natural light at 7:30 am to take an outdoor photo.


Yarn: Lana Grossa Airwool and size 13 needles. It's a very soft yarn -- mostly merino wool with some acrylic. It's flat, with a layer of unplied merino sewn to a layer of acrylic. I hardly ever work with such large needles, so I lose a bit of the implied speed of big needles and yarn. I did learn to cable without a needle for this project, as the cables are 1x1, and when I knit in the round I knit continental, so I have trouble handling a cable needle. So that was nice. And she loves the hat, which is all I really cared about.

On to other knitting news
I'm finishing up some projects in order to clear as many UFOs off my list as possible.

FLAK - Done!


But I'm thinking about ripping out the neck and redoing it with fewer stitches. It feels a little wide to me. I knit 2" of ribbing and then sewed the live stitches to the inside. So maybe I'll rip back a few rows and do a regular bind off and be happy with that. Otherwise, I love this sweater. I've worn it five of the past seven days. It's State Fair worthy, assuming I can keep from spilling anything on it.

Samus - I'm about to try my third attempt at the zipper, having done some research in order to make this attempt my last.

Pomatomus

This single sock has languished on the needles mid-foot since this summer. These are a gift (no deadline) for a good friend, but I was not enjoying the 4-needle dpn method for the instep (I like 5-dpns or Magic Loop). I didn't have the right circ size to do this ML, so I bought the KnitPicks Harmony needles in 2.75mm and 2.25mm to fill in where I didn't have Classics in all the sizes. I don't use those two sizes much, and I wanted a way to easily tell them apart from my 2.5mm needles, which are my "normal" sock needles.

These quick projects, just finished

I finally understood the concept of a wrist warmer last week when it my mouse hand froze while resting on the kitchen counter. So I whipped up this single guy from leftovers of Knit Picks Panache. It's a discontinued yarn, which is too bad, because it was wonderful to knit with and it's fabulous on the skin (merino, alpaca, silk, and cashmere -- what could be wrong with that?)

Following that, I made a whole pair from Malabrigo Bulky.

More are on the horizon, as Sophia wants a pair in navy to wear at school, where some of the rooms are very cold.

New for 2008 - I've made an argyle sock for the Master Hand Knitting Program, Level 2.

Sock the first:


I always planned to make a complete pair (so I could wear them!) and since I wrote the pattern myself, I used the first sock as a learning experience for dealing with the yarn ends and the seams. A friend had told me that superwash wool could be spit spliced with extra felting time, but I didn't find that to be true, much to my disappointment. She's done it herself, so clearly there is something different, either with the yarn she used or her technique. Could be that her yarn didn't also have nylon. At any rate, I ended up with a lot of ends, and while I love the duplicate stitch method of weaving in ends, they seem very noticeable to my eye on this sock. I don't know if it's because the yarns are solid colors, or because they are knit at a tighter gauge or what. I tried Russian splicing for a while and didn't like it, but I've since acquired some thinner needles with straight tips (i.e. not Chibi bent-tip needles) and that has made some difference. I also tried splitting the plies and duplicate stitching the thinner ends and that looks better, too.

For the second sock, I'm planning to wind the entire estimated length needed for a particular color block so I can eliminate as many ends to weave in as possible. I'm curious to see what washing and blocking will do to even out my stitches, too. I get the same gauge knitting flat as I do in the round, but I sometimes see a zig-zag effect in my flat knitting that I don't see when the knitting is all in one direction.

Up next in MK Level II Land is the Fair Isle mitten. I'll probably knit three of these: a pair for my daughter, who picked out the colors, and a third for the binder. I haven't done much stranded color work in the past couple years, and I've accumulated a few new methods of knitting in the round, so I'm going to need the practice to get the hang of proper tension again.

There's more, but it's late and we're off to the World of Mickey for a long vacation with extended family.

Merry Christmas, Happy Solstice, Happy New Year, etc.

Monday, November 26, 2007

Out of Hibernation

I'm blowing off a thick layer of blog dust here. I'll try to get caught up here as best I can.

First, this baby is out of hibernation and on the road to completion:

My FLAK sweater. Everything has been knit, but there may be reknitting to be done once I've blocked it, as my swatch relaxed quite a bit after its wash. The sweater seems frighteningly small, so I am trusting the swatch. I'm not sure about the bottom ribbing, though.


I may not have decreased enough. Which will totally suck, if I didn't, because I spent an hour figuring out where to decrease the places I did to keep the honeycomb and 1x1 ribs continuing down to the cast off edge

And then there's the neck ribbing. I may have too many stitches there, too.

And of course, there are the sleeve cuffs, which have been a problem forever.

I'll be ripping those back and reworking them for the (I think) fourth time. They're still too tight. I decreased to an amount that would have worked for regular ribbing, but the cables make it tighter. After doing the body ribbing, I'm thinking I'll not continue the braid, but only the 1x1 cables, with maybe one or two more stuck in there (but not for the whole cuff).

Sock Monkey hat

Heavily modified from the free Knitty pattern. I used worsted weight Cascade 220, and changed the mouth to more closely resemble a sock monkey. He seems rather ambivalent. If I were to knit another one (ha) I'd make his mouth edges more pointy, to look more like a sock heel. Or, horrors, knit a protruding, short-row mouth on it. As it is, this is sufficient to embarrass my 10-year-old at the skating rink when I'm the ice monitor.

Here the hat is again, modeled by my older, nearly-13-year-old ambivalent daughter.


There are lots of socks from this summer, most particularly the Lupine Lace socks (Fiber Trends pattern) for my friend Jill, who was diagnosed with breast cancer.


More projects updated later this week.

I'm on Ravelry now (part of why I've been so absent on the blog), and really enjoy it over there.

Thursday, August 02, 2007

Bunnies, not bridges

Well. There's been a bit of excitement here in Minneapolis the past 15 hours or so. I had the 6 o'clock news on, watched the weather, then went outside to check the garden with no idea of what was happening just a few miles from my house.

I have more than flowers and vegies growing in the garden this summer.


Michael came home while I was outside and said one of the 35W bridges had collapsed. Since they've been taking bridges down along that highway lately, I assumed something planned went a little awry. Sadly, not the case.

All is well with me and mine, and with my friends and family.

The Red Cross is asking for blood donations, but I'm no longer allowed to do that (due to living in the U.K. 20+ years ago and the "threat" of having incubating Mad Cow disease). So I'll pick some tomatoes and get a fix of cuteness, instead.

Hope all is well for anyone with family or friends in the Twin Cities.

Tuesday, July 31, 2007

Disapparating, reapparating

Been awhile. Let's see...

Kids finished the school year.
I did more laundry than I thought possible, in order to pack for a three-week trip to Europe.

Here's what I did on the airplane (shocking, isn't it?)

First stop: London. I abandoned the extended family (there were 12 of us there) for a day to take a train north to see my friend Rachel in Yorkshire. She dutifully attended to my needs for the day, such as driving here:

for a tour and a half-pint. Next, we headed toward the Dales, stopping at some abbey ruins. I didn't realize how noisy my life was until we were wandering around the abbey. All I could hear were humming bees, twittering birds, and these:

Sheep! Wool on the hoof!

While in the Dales, we stopped to get Wensleydale cheese (Gommit's favorite) and drove up some rather steep hills to this place:

It's a farm track, basically, but you know what else it is? An ancient Roman road. And guess what we saw up there?

Sheep! With tails! And look at this...

Just like Qiviut, only without the musk ox.

Truly a wonderful day.

In London, we had a private capsule for the lot of us while we rode the London Eye. We got to go around twice, and had tea and scones and little finger sandwiches. Very fun.

We went to Hampton Court on a little bus, escorted by our guide Encyclopedia Leone, who knew every bit of the Royal Family Tree, including the juicy bits, and who could answer every single question we had in an informative and entertaining fashion. Another stellar day, marred only by the torrential downpour when we left, which actually wouldn't have been so bad except for the car that drove by that didn't just splash us, but nearly drowned us with a 10 foot tsunami-like wave of black water.

I went to the Victoria and Albert Museum to see the oldest samples of actual knitting that they have in their collection and came away bitterly disappointed. It seems that just because something is in their collection doesn't mean they have it on display.

I bought some Rowan DK superwash at Liberty of London (this country would be a better place if our department stores carried yarn, too). I dragged the girls with me because I wanted them to ride the Tube. A great idea with less than desirable results, as the Tube stop closest to our hotel and the two lines that would have provided the most direct route were closed for the weekend to upgrade tracks. This perked up the girls, though:

one of two giant walls of buttons. They got to pick out four or five each to take as souvenirs for their scrapbooks. Well, I did make one of them exchange a $25 button for a $1 button, but she still ended up with four or five.

Next, Barcelona and socks I knit while I was away.

Thursday, May 10, 2007

Swatch, ho!

I'm on the homestretch for my Level II swatches.

Swatch #1 - Stockinette seam

It looks a little off. I think I'll rip it out and re-do it.

Swatch #4 - Single rib seam - swatches knit but not yet seamed. Well, they were seamed, but like the stockinette seam, I was off a half-stitch, so I ripped out the seam and re-did it. Then I realized I'd seamed it with the same color as the swatch. Sigh.

Swatch #5 - Double rib seam - swatches knit but not yet seamed
Swatch #7 - Horizontal to horizontal seam - knit but not yet seamed

Swatch #8 - Twisted blended decreases


Swatch #9 - Twisted full fashioned decreases


My thoughts on twisted decreases are that if I were to use them on an actual project, I'd choose the decreases on the left of each swatch for blended decreases and the decreases on the right of each swatch for full-fashion decreases. The instructions called for decreasing at either end of the same rows, but the best matches are decreases that are not worked on the same rows. Decreases for swatch 8 were worked from the stockinettet side. Decreases for swatch 9 were worked from the reverse stockinette side, so while they lean in one direction from the stockinette side, they lean in the other direction on the reverse stockinette side, where they were worked. A decrease that is worked from the stockinette side and leans right is the best match for a decrease that is worked from the reverse stockinette side and leans right (but which leans left when viewed from the stockinette side).

Decreases that lean right in relation to the side on which they are worked are less obvious and best suited for blended decreases. Decreases that lean left in relation to the side on which they are worked are more obvious and are best suited for full-fashioned decreases, to my tastes anyway.

Swatch #13 - Lace swatch #3, currently working on something from my Harmony Guide, but I'm not happy. If I could find a decent needle to use with my lace weight yarn I'd be happier with the results.

Swatch #14 - Cable swatch #1 OXOX cable (from The Harmony Guide to Knitting Stitches, p 77, but I've seen it in just about every stitch dictionary I have)


Swatch #15 - Cable swatch #2 (from The New Knitting Stitch Library, Lesley Stanfield, p. 66, #105)


Swatch 16a - Cable exercise - done
Swatch 16b - Cable flare swatch - knit except for final seed stitch border. The hardest part of this exercise was figuring out the most aesthetically pleasing decreases to transition from the cables to the final border.

Swatch #19 - Seed stitch buttonholes - still looking for a good horizontal buttonhole. I have an idea that I'll work on after I do the 3rd lace swatch. It's a variation on Elizabeth Zimmerman's afterthought buttonhole. More of a forethought buttonhole with a different cast-off than she suggests.

Swatch #20 - Buttonholes spaced evenly


Swatch #22 - Inset pocket

I plan to do a second one to see if I can improve on a couple things I don't like. First, I intentionally cast off firmly at the top of the pocket because I didn't want a floppy edge, but I think I over did it. Bind off options are somewhat limited because it's worked in the middle of a row. I suppose I could break the yarn, put the live stitches on a holder and then rejoin, but I'm always hesitant to not follow the MK instructions exactly, particularly when they give you the pattern they want you to follow. Although now that I think of it, I could probably work a tubular bind off across the pocket and resume knitting without breaking the yarn. Or even a Cast On/Cast Off, worked in the reverse direction. Hmmmm.

The second problem is that I worked this swatch over a period of several days in varying conditions/positions and I think it shows on the back. Look at all the rowing out:


That's my progress so far. I have started working on my swatch tags, but not a single yarn tail has been woven in yet. I tend to save that for when I'm sure the swatch I have is the swatch I'll submit.

Wednesday, April 25, 2007

I heart Montse Stanley

This book:
Reader's Digest Knitter's Handbook, by Montse Stanley
should be on every knitter's shelf. You may ask yourself when you first crack it open why you would ever need 948 (give or take a couple hundred) methods of casting on, but once you get a load of the World's Most Perfect Horizontal Buttonhole, which Montse modestly calls the "Standard Buttonhole" (p. 195), you will be happy to hear there is a "Buttonhole Cast On" that -- get this -- is perfect for buttonholes (p. 76) Once you figure out how to actually do a Buttonhole Cast On, that is. There's quite a list of instructions, with one measly drawing and a cross reference to the Twisted Loop Cast On (p. 66).

Any time I don't like the way a standard technique turns out in a particular situation, Montse is there, with her 948 methods of casting on, or her 357 ways of increasing and decreasing.

Here are some not-so-great buttonholes:

The one on the left is a 2-row buttonhole using a cable cast on. The buttonhole isn't bad, but the stitches to the left of it are enlarged and the whole thing pulls in. Blech. The one on the right is the Revised One-row Horizontal buttonhole from Nancie Wise's The Knitter's Book of Finishing Techniques. A good book, and this buttonhole looks fine in a single rib buttonhole band, but seed stitch lays flat, so you can see everything bad about a particular buttonhole.

Here's the buttonhole that made me love Montse:


Granted, this was done within a single rib band, but it looks great, and stretches right along with the ribbing.

Here it is in a full-size double rib band:


Montse? Wherever you are in the hereafter, this one's for you: Mmmwah!

Monday, April 23, 2007

All Master Knitting all the time

I imagine the fervor will diminish once I get all the swatches and questions done, because then it's the three projects.

Swatch update:
Swatch #2 - Reverse stockinette seam - FINISHED


I'm worried that the purl stitches at the seam look too tight/small.


Swatch #3 - Seed stitch seam - FINISHED


I've never seen seed stitch seamed. It looks OK, if not great, to me.

Swatch #6 - Vertical to horizontal seam - FINISHED

but I want to fix a tiny error:


Swatch #8 - Twisted blended decreases - FINISHED
(no pic yet)

Swatch #10 - CDD decreases - FINISHED


Swatch #11 - Lace swatch #1 (Vertical lace trellis) FINISHED; pattern instructions FINISHED


Swatch #12 - Lace swatch #2 (Star rib lace) FINISHED (but I may re-do it to make the CDDs look nicer)


Swatch #17 - Single rib buttonholes - FINISHED, but I'm not crazy about my ribbing

I also wasn't sure if I spaced these correctly. They're supposed to be 2" apart, which is easy to do when you're doing identical buttonholes, but because the first one is vertical and is about 1/2" long, I wasn't sure how they defined 2" apart. I decided to measure from the start of one buttonhole to the start of the next. I'll explain that in the materials to show that I do know how to measure.

Swatch #21 - Picking up stitches - FINISHED


Bits I've started
Swatch #1 - Stockinette seam - swatches knit, but not sewn
Swatch #4 - Single rib seam - The bane of my knitting existence. Level II will be the level in which I perfect rib selvedges while simulanteously achieving perfect, even rows of rib
Swatch #5 - Double rib seam - 2 swatches knit, each on different size needles to see if I can improve them
Swatch #7 - Horizontal to horizontal seam - one swatch knit


Bits I haven't started at all
Swatch #9 - Twisted full fashioned decreases
Swatch #13 - Lace swatch #3 (undecided)
Swatch #14 - Cable swatch #1 (undecided)
Swatch #15 - Cable swatch #2 (undecided)
Swatch 16a - Cable exercise
Swatch 16b - Cable flare swatch
Swatch #18 - Double rib buttonholes
Swatch #19 - Seed stitch buttonholes
Swatch #20 - Buttonholes spaced evenly
Swatch #22 - Inset pocket

Wednesday, April 18, 2007

Holey lace swatch, Knitgirl!

This past weekend was an exercise in lace relations. Master Hand Knitting Level I, with one exception, had specific instructions for exactly what and how to knit each swatch. In Level II, there is more latitude, which is really nice. There are three lace swatches required, and for each of them there are some specific parameters: 1" seed stitch border top and bottom, and 5 st seed stitch edges right and left. Also, a maximum size of 7"x7". There must be at least 2 multiples and 3 repeats of the pattern in the swatch. The patterns, though, are up to me.

I flipped through my only Barbara Walker Treasury (the 2nd Treasury) and found three or four candidates. I ran into a snag right away with the first one, which is the Starlight Lace pattern, on page 288. Actually, there were several snags. First, the directions are written out rather than charted, and I have come to love charts. Out came the graph paper. Second, there are two rows where the stitch count goes down quite a bit, which makes charting slightly more challenging, because you have to place the black "no stitch" squares where they make the most sense so the chart reflects the actual knitted pattern as much as possible. Third, there seemed to be a minor typo in one of those decrease-heavy rows:

Row 6--K2, k2 tog, *yo, sl2-k1-p2sso, sl 1-k2tog-psso; rep from *, end yo, sl 2-k1,p2sso, yo, ssk, k2

This pattern is worked over a multiple of 6 sts plus 5, so clearly (well, maybe not clearly at first) there is a problem with the part that says "end yo, sl 2..." What I eventually figured out was that the last part, excluding the k2 at the very end was how the last multiple was to be worked. That is, for the last multiple, instead of the centered double decrease, I was supposed to work an ssk.

The instructions should have said:
Row 6--K2, k2 tog, *yo, sl2-k1-p2sso, sl 1-k2tog-psso; rep from *, end last repeat ssk instead of sl 2-k1-p2sso; k2

Which brings me to the fourth snag: how do I chart that last repeat?

A Google search eventually landed me at Sticks-or-Nothing where the wonderful blogger there has a Reference Shelf of tutorials on various knitting techniques, including how to chart knitting patterns in a series of six tutorials. (Warning: these pages take a loonnnnggg time to load, but they're worth it.) The final charting tutorial includes a examples of how to convert patterns to charts, and how to deal with some particularly complex patterns, such as those with varying stitch counts, unusual repeats, etc. Her specific example was for the Starlight Lace pattern, so not only did I learn how to deal with this stuff, I had a step-by-step tutorial on how to go about handling the exact pattern I was having problems with. Cool.

First, though, I decided to knit an easy lace swatch: Flame Chevron, from the 2nd Treasury, p 276.


I nearly hit the 7"x7" swatch size limit on this one. It's tricky to find something interesting to knit, while making sure to have at least three multiples and two repeats but not going over the size limits, except aaaaaaaarrrrrghhh! It's supposed to be at least two multiples and three repeats, which means I can't use this one, because I can't do another repeat and keep the swatch under 7". Ah well, I can still donate the picture to the Walker Treasury Project, so that's something.

Monday I headed to Needlework Unlimited to buy laceweight yarn and Walker's first Treasury of Knitting Patterns. I figured if I used skinnier yarn, I'd have more pattern selection flexibility. The problem is, it turns out I can't frigging knit with laceweight yarn. Sigh. So I picked some new patterns:


Vertical Lace Trellis, from the first Treasury, p. 191. Worked over an odd number of stitches and a 4-row repeat, so easy to fit within the MK II swatch parameters. I used KnitPicks Bare 100% merino fingering for this. I like it.

I also knit this:


Star Rib Mesh, also from the first Treasury, page 196. I'm not crazy about the vertical line up of my central double decreases and alternate knit stitches, and I think this would look better in laceweight. I may knit this one again. First, I'll knit a few other patterns to see if I like something else better.

Knitting group is this morning, and it's a sunny, beautiful day. What could be better?

Friday, April 13, 2007

Diamonds are a girl's best friend

I have re-designed the argyle sock for my Master Knitting Level II sock.

I spent a long time planning the sock before I ever started knitting. I studied as many charts for other argyles as I could lay my hands on in order to understand how the diamonds worked. My original design incorporated diamonds in the contrast colors centered in the front. The contrast diamond corners had one-stitch points. The main color diamonds had two-stitch corner points. The diamond lines intersected at the center of the contrast diamonds in one stitch. They intersected at the center of the main color diamonds in a block of four stitches.

Like this


These contrast diamonds are 33 stitches across and 33 stitches high. The main-color diamonds are 32 stitches across and 32 stitches high. The pattern is 67 stitches wide. The edge stitches are both center columns of contrast diamonds. This creates a problem, because in order for the contrast diamonds to be centered down the front of the sock and for the pattern to match going down the back the seam has to use 1/2 a stitch from each edge, which is not ideal for a couple reasons: I don't think a half-stitch seam looks as good as a full-stitch seam, and I think the seam would look especially bad where the center of the black diamond meets, because that's just one stitch of color there and I would worry about tension issues. If I used a full stitch, which would create a nicer looking seam, there wouldn't be a center column up the back of the sock. The contrast diamonds would meet like this:


Unless I added an extra column of plain stitches at each edge, in which case I'd have a seam like this:


Even more frustrating is that every photo of argyle socks I've seen shows the socks from the side or the front, so I can't see what the seam looks like. Maybe it's okay if they don't match exactly, I thought.

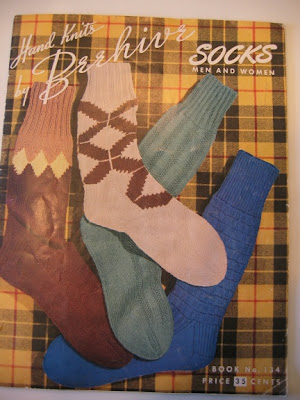
Some of the argyle knee socks in my vintage sock pattern book

have calf shaping and it's clear the patterns can't match all the way up.


See the gray knee-high with the red and brown diamonds? That one doesn't match up.

The finishing instructions in this book are no help, either. "Sew up back seam neatly, matching colors."

After complaining about my seam dilemma at knitting group, Shelly (who has made argyle socks for her MK Level II) insisted there were stitch counts that worked out perfectly, but she couldn't remember for sure what they were. I insisted it wasn't possible. Turns out we were both right.

The pattern can't work out if the top and bottom points of the diamonds have single-stitch corners--regardless of stitch count--if you want a full-stitch seam because on either side of the seam there has to be only 1/2 of the diamond's single-stitch point. You can only get that with a half-stitch seam.

I reworked the pattern to switch the shape of the contrast diamonds with the main color diamonds (which had two-stitch points at all corners), but I didn't like the way it looked. I didn't want the block of four black stitches in the middle of the contrast diamonds. I don't know why. I just didn't.

So. Back to the internet. I found Flory's pattern, which mysteriously had contrast diamonds with single points and line diamonds that all intersected at one stitch in each solid diamond. Huh. I looked closer. How'd she do that? I counted stitches. Aha! Her single-pointed diamonds were not all the same size. I re-did her chart with gridlines and colors so I could see better what was going on. I also flipped it around so the instep is on top, and added another repeat on the leg.


While I liked the idea of all the line diamonds intersecting at just one point, the single-points on the top and bottom of the diamonds still meant an odd stitch count, so the seam would still be an issue.

So what's my solution?

Contrast diamonds with single-stitch points on the right and left, but two-stitch points on the top and bottom. This allows the sock to have an even number of stitches so the diamonds can be centered up the leg in the front and back, and but it doesn't require the contrast diamonds to have a four-stitch intersection of the line diamonds. It's two stitches, not one, but I like it better than the block of four, and I get my full-stitch seam to boot.

This pattern has 74 stitches across the leg (2 will be used for the back seam). The "extra" stitch at each edge is plain. There's no need to continue the line diamonds to the edge, since they'd just be hidden inside the seam anyway. The old sock was 67 stitches across the leg. I increased this one to 74 because I was getting 10 sts/inch with the Opal yarn. I have an 8" ankle and usually knit a 7" circumference sock because I like about an inch of negative ease. I also like a number divisible by 4 so I can do k2p2 ribbing because I like that better than k1p1. So that gave me 72 stitches, plus the seam stitches.

Anyone interested in charting their own argyle should start with the stitch count they want (56, 64, 72, etc.), then divide by 2 to get the width of the contrast diamonds. The height of the contrast diamonds will be 1 less than that. The width and height of the main color diamonds will be 2 less than the width of the contrast diamonds. For example: my contrast diamonds are 36 sts wide, 35 rows high. The main color diamonds are 34 sts wide, 34 sts high, as they have two-stitch corners at all points. Of course, if you want smaller diamonds, you can always do four across instead, but the approach is still the same.

If that made your eyes cross, here's a chart:


Total stitch count

(not incl seam stitches)

Contrast diamond width, in stitches

(stitch count / 2)

Contrast diamond height, in rows

(contrast width – 1)

Main color diamond width/height in stitches and rows

(contrast width – 2)

56

28

27

26

60

30

29

28

64

32

31

30

68

34

33

32

72

36

35

34


(Don’t forget to cast on two extra stitches for the seaming!)