This book:
Reader's Digest Knitter's Handbook, by Montse Stanley
should be on every knitter's shelf. You may ask yourself when you first crack it open why you would ever need 948 (give or take a couple hundred) methods of casting on, but once you get a load of the World's Most Perfect Horizontal Buttonhole, which Montse modestly calls the "Standard Buttonhole" (p. 195), you will be happy to hear there is a "Buttonhole Cast On" that -- get this -- is perfect for buttonholes (p. 76) Once you figure out how to actually do a Buttonhole Cast On, that is. There's quite a list of instructions, with one measly drawing and a cross reference to the Twisted Loop Cast On (p. 66).
Any time I don't like the way a standard technique turns out in a particular situation, Montse is there, with her 948 methods of casting on, or her 357 ways of increasing and decreasing.
Here are some not-so-great buttonholes:
The one on the left is a 2-row buttonhole using a cable cast on. The buttonhole isn't bad, but the stitches to the left of it are enlarged and the whole thing pulls in. Blech. The one on the right is the Revised One-row Horizontal buttonhole from Nancie Wise's The Knitter's Book of Finishing Techniques. A good book, and this buttonhole looks fine in a single rib buttonhole band, but seed stitch lays flat, so you can see everything bad about a particular buttonhole.
Here's the buttonhole that made me love Montse:
Granted, this was done within a single rib band, but it looks great, and stretches right along with the ribbing.
Here it is in a full-size double rib band:
Montse? Wherever you are in the hereafter, this one's for you: Mmmwah!
Wednesday, April 25, 2007
Monday, April 23, 2007
All Master Knitting all the time
I imagine the fervor will diminish once I get all the swatches and questions done, because then it's the three projects.
Swatch update:
Swatch #2 - Reverse stockinette seam - FINISHED
I'm worried that the purl stitches at the seam look too tight/small.
Swatch #3 - Seed stitch seam - FINISHED
I've never seen seed stitch seamed. It looks OK, if not great, to me.
Swatch #6 - Vertical to horizontal seam - FINISHED
but I want to fix a tiny error:
Swatch #8 - Twisted blended decreases - FINISHED
(no pic yet)
Swatch #10 - CDD decreases - FINISHED
Swatch #11 - Lace swatch #1 (Vertical lace trellis) FINISHED; pattern instructions FINISHED
Swatch #12 - Lace swatch #2 (Star rib lace) FINISHED (but I may re-do it to make the CDDs look nicer)
Swatch #17 - Single rib buttonholes - FINISHED, but I'm not crazy about my ribbing
I also wasn't sure if I spaced these correctly. They're supposed to be 2" apart, which is easy to do when you're doing identical buttonholes, but because the first one is vertical and is about 1/2" long, I wasn't sure how they defined 2" apart. I decided to measure from the start of one buttonhole to the start of the next. I'll explain that in the materials to show that I do know how to measure.
Swatch #21 - Picking up stitches - FINISHED
Bits I've started
Swatch #1 - Stockinette seam - swatches knit, but not sewn
Swatch #4 - Single rib seam - The bane of my knitting existence. Level II will be the level in which I perfect rib selvedges while simulanteously achieving perfect, even rows of rib
Swatch #5 - Double rib seam - 2 swatches knit, each on different size needles to see if I can improve them
Swatch #7 - Horizontal to horizontal seam - one swatch knit
Bits I haven't started at all
Swatch #9 - Twisted full fashioned decreases
Swatch #13 - Lace swatch #3 (undecided)
Swatch #14 - Cable swatch #1 (undecided)
Swatch #15 - Cable swatch #2 (undecided)
Swatch 16a - Cable exercise
Swatch 16b - Cable flare swatch
Swatch #18 - Double rib buttonholes
Swatch #19 - Seed stitch buttonholes
Swatch #20 - Buttonholes spaced evenly
Swatch #22 - Inset pocket
Wednesday, April 18, 2007
Holey lace swatch, Knitgirl!
This past weekend was an exercise in lace relations. Master Hand Knitting Level I, with one exception, had specific instructions for exactly what and how to knit each swatch. In Level II, there is more latitude, which is really nice. There are three lace swatches required, and for each of them there are some specific parameters: 1" seed stitch border top and bottom, and 5 st seed stitch edges right and left. Also, a maximum size of 7"x7". There must be at least 2 multiples and 3 repeats of the pattern in the swatch. The patterns, though, are up to me.
I flipped through my only Barbara Walker Treasury (the 2nd Treasury) and found three or four candidates. I ran into a snag right away with the first one, which is the Starlight Lace pattern, on page 288. Actually, there were several snags. First, the directions are written out rather than charted, and I have come to love charts. Out came the graph paper. Second, there are two rows where the stitch count goes down quite a bit, which makes charting slightly more challenging, because you have to place the black "no stitch" squares where they make the most sense so the chart reflects the actual knitted pattern as much as possible. Third, there seemed to be a minor typo in one of those decrease-heavy rows:
Row 6--K2, k2 tog, *yo, sl2-k1-p2sso, sl 1-k2tog-psso; rep from *, end yo, sl 2-k1,p2sso, yo, ssk, k2
This pattern is worked over a multiple of 6 sts plus 5, so clearly (well, maybe not clearly at first) there is a problem with the part that says "end yo, sl 2..." What I eventually figured out was that the last part, excluding the k2 at the very end was how the last multiple was to be worked. That is, for the last multiple, instead of the centered double decrease, I was supposed to work an ssk.
The instructions should have said:
Row 6--K2, k2 tog, *yo, sl2-k1-p2sso, sl 1-k2tog-psso; rep from *, end last repeat ssk instead of sl 2-k1-p2sso; k2
Which brings me to the fourth snag: how do I chart that last repeat?
A Google search eventually landed me at Sticks-or-Nothing where the wonderful blogger there has a Reference Shelf of tutorials on various knitting techniques, including how to chart knitting patterns in a series of six tutorials. (Warning: these pages take a loonnnnggg time to load, but they're worth it.) The final charting tutorial includes a examples of how to convert patterns to charts, and how to deal with some particularly complex patterns, such as those with varying stitch counts, unusual repeats, etc. Her specific example was for the Starlight Lace pattern, so not only did I learn how to deal with this stuff, I had a step-by-step tutorial on how to go about handling the exact pattern I was having problems with. Cool.
First, though, I decided to knit an easy lace swatch: Flame Chevron, from the 2nd Treasury, p 276.
I nearly hit the 7"x7" swatch size limit on this one. It's tricky to find something interesting to knit, while making sure to have at least three multiples and two repeats but not going over the size limits, except aaaaaaaarrrrrghhh! It's supposed to be at least two multiples and three repeats, which means I can't use this one, because I can't do another repeat and keep the swatch under 7". Ah well, I can still donate the picture to the Walker Treasury Project, so that's something.
Monday I headed to Needlework Unlimited to buy laceweight yarn and Walker's first Treasury of Knitting Patterns. I figured if I used skinnier yarn, I'd have more pattern selection flexibility. The problem is, it turns out I can't frigging knit with laceweight yarn. Sigh. So I picked some new patterns:
Vertical Lace Trellis, from the first Treasury, p. 191. Worked over an odd number of stitches and a 4-row repeat, so easy to fit within the MK II swatch parameters. I used KnitPicks Bare 100% merino fingering for this. I like it.
I also knit this:
Star Rib Mesh, also from the first Treasury, page 196. I'm not crazy about the vertical line up of my central double decreases and alternate knit stitches, and I think this would look better in laceweight. I may knit this one again. First, I'll knit a few other patterns to see if I like something else better.
Knitting group is this morning, and it's a sunny, beautiful day. What could be better?
Friday, April 13, 2007
Diamonds are a girl's best friend
I have re-designed the argyle sock for my Master Knitting Level II sock.
I spent a long time planning the sock before I ever started knitting. I studied as many charts for other argyles as I could lay my hands on in order to understand how the diamonds worked. My original design incorporated diamonds in the contrast colors centered in the front. The contrast diamond corners had one-stitch points. The main color diamonds had two-stitch corner points. The diamond lines intersected at the center of the contrast diamonds in one stitch. They intersected at the center of the main color diamonds in a block of four stitches.
Like this
These contrast diamonds are 33 stitches across and 33 stitches high. The main-color diamonds are 32 stitches across and 32 stitches high. The pattern is 67 stitches wide. The edge stitches are both center columns of contrast diamonds. This creates a problem, because in order for the contrast diamonds to be centered down the front of the sock and for the pattern to match going down the back the seam has to use 1/2 a stitch from each edge, which is not ideal for a couple reasons: I don't think a half-stitch seam looks as good as a full-stitch seam, and I think the seam would look especially bad where the center of the black diamond meets, because that's just one stitch of color there and I would worry about tension issues. If I used a full stitch, which would create a nicer looking seam, there wouldn't be a center column up the back of the sock. The contrast diamonds would meet like this:
Unless I added an extra column of plain stitches at each edge, in which case I'd have a seam like this:
Even more frustrating is that every photo of argyle socks I've seen shows the socks from the side or the front, so I can't see what the seam looks like. Maybe it's okay if they don't match exactly, I thought.
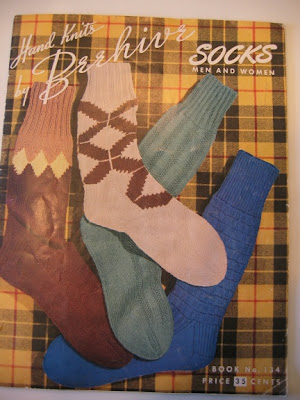
Some of the argyle knee socks in my vintage sock pattern book
have calf shaping and it's clear the patterns can't match all the way up.
See the gray knee-high with the red and brown diamonds? That one doesn't match up.
The finishing instructions in this book are no help, either. "Sew up back seam neatly, matching colors."
After complaining about my seam dilemma at knitting group, Shelly (who has made argyle socks for her MK Level II) insisted there were stitch counts that worked out perfectly, but she couldn't remember for sure what they were. I insisted it wasn't possible. Turns out we were both right.
The pattern can't work out if the top and bottom points of the diamonds have single-stitch corners--regardless of stitch count--if you want a full-stitch seam because on either side of the seam there has to be only 1/2 of the diamond's single-stitch point. You can only get that with a half-stitch seam.
I reworked the pattern to switch the shape of the contrast diamonds with the main color diamonds (which had two-stitch points at all corners), but I didn't like the way it looked. I didn't want the block of four black stitches in the middle of the contrast diamonds. I don't know why. I just didn't.
So. Back to the internet. I found Flory's pattern, which mysteriously had contrast diamonds with single points and line diamonds that all intersected at one stitch in each solid diamond. Huh. I looked closer. How'd she do that? I counted stitches. Aha! Her single-pointed diamonds were not all the same size. I re-did her chart with gridlines and colors so I could see better what was going on. I also flipped it around so the instep is on top, and added another repeat on the leg.
While I liked the idea of all the line diamonds intersecting at just one point, the single-points on the top and bottom of the diamonds still meant an odd stitch count, so the seam would still be an issue.
So what's my solution?
Contrast diamonds with single-stitch points on the right and left, but two-stitch points on the top and bottom. This allows the sock to have an even number of stitches so the diamonds can be centered up the leg in the front and back, and but it doesn't require the contrast diamonds to have a four-stitch intersection of the line diamonds. It's two stitches, not one, but I like it better than the block of four, and I get my full-stitch seam to boot.
This pattern has 74 stitches across the leg (2 will be used for the back seam). The "extra" stitch at each edge is plain. There's no need to continue the line diamonds to the edge, since they'd just be hidden inside the seam anyway. The old sock was 67 stitches across the leg. I increased this one to 74 because I was getting 10 sts/inch with the Opal yarn. I have an 8" ankle and usually knit a 7" circumference sock because I like about an inch of negative ease. I also like a number divisible by 4 so I can do k2p2 ribbing because I like that better than k1p1. So that gave me 72 stitches, plus the seam stitches.
Anyone interested in charting their own argyle should start with the stitch count they want (56, 64, 72, etc.), then divide by 2 to get the width of the contrast diamonds. The height of the contrast diamonds will be 1 less than that. The width and height of the main color diamonds will be 2 less than the width of the contrast diamonds. For example: my contrast diamonds are 36 sts wide, 35 rows high. The main color diamonds are 34 sts wide, 34 sts high, as they have two-stitch corners at all points. Of course, if you want smaller diamonds, you can always do four across instead, but the approach is still the same.
If that made your eyes cross, here's a chart:
Total stitch count (not incl seam stitches) | Contrast diamond width, in stitches (stitch count / 2) | Contrast diamond height, in rows (contrast width – 1) | Main color diamond width/height in stitches and rows (contrast width – 2) |
56 | 28 | 27 | 26 |
60 | 30 | 29 | 28 |
64 | 32 | 31 | 30 |
68 | 34 | 33 | 32 |
72 | 36 | 35 | 34 |
(Don’t forget to cast on two extra stitches for the seaming!)
Wednesday, April 11, 2007
The neverending hallway of knitting
I measured the back of the Aran a few days ago and determined that it needed a few more inches before I started in on the ribbing. I noted that 2 vertical honeycombs were an inch in length, so somehow that meant I'd need 38 vertical honeycombs before I switched to the ribbing. Maybe I thought I was knitting an Aran belly shirt, but more likely I was just lying to myself. The 38 honeycombs are done, but the back isn't ready for ribbing. Rather than knit on the Aran, I planned my decreases for the ribbing which took way more planning than I anticipated because I want to continue the honeycombs and the 2-st cables all the way to the bottom, with K2P2 ribbing in between. This means I have to decrease a certain number of stitches at certain points between these cables that leave me with multiples of 4 +2 stitches between each of the established cables. Oy.
Luckily, I have a short attention span and lots of ideas for other things I could be working on.
My Master Hand Knitting Level II instructions arrived and I read through them. Having been confronted with my detail handling deficit during the course of Level I, I am approaching Level II with wisdom and experience. Like taking notes when I knit swatches so I know what I did to achieve specific results, and citing references in my answers to the questions from the get go. My approach this time is: Read question. If I know the answer, key it in on the computer. Find confirmation in two sources. Cite sources, including page numbers. If I am unsure of the answer, figure it out and confirm it with my reference library. Cite the sources, cite the sources, cite the sources.
And so it went, for 14 or 15 of the questions. For the rest, I have to do some knitting. so it was on to the swatching...
I finally have my stockinette mojo back. I can purl without rowing out the first two stitches, having figured out that I need to purl the first stitch of the row with absolutely no snugging, tugging, or yanking whatsoever. Then I purl the second stitch normally, insert my needle into the third stitch and THEN I snug. Perfection.
I'm still working out my K2P2 issues at either end. One end looks incredibly sloppy, while the other end (the left end of the public side) is strangely tight. The more I yank and tug and snug on the right end, the sloppier it gets. Hmmm. I believe my problem is too much tugging, even though that seems counter intuitive. So for K2P2, I need to maintain a looser tension on the right end of the public side to make things tighter, and coming back, I need to keep things looser to make things looser. No wonder I was going insane in Level I.
Swatching gets boring after a while, not to mention frustrating, so I looked at the required projects. Fair Isle mitten (pattern included), argyle sock (pattern available, if needed), and vest. It's been a while since I've done stranded knitting, so I experimented a little bit and realized I'm going to need to practice for that one. The thing I dislike most about the knitting requirements of the Master Knitting program is having to knit with worsted weight yarn. With the exception of things like felted slippers and Aran sweaters, I don't knit with worsted weight much. It seems so thick, and the needles seem huge. I learned to knit with DK and fingering weight yarns. I've never knit anything stranded using worsted weight yarn. It's always been Dale Baby Ull or something like that, so this is an adjustment.
So what did I do next? I designed my own argyle sock. I had this great idea (or so I thought) to use self-striping yarn for the main color, with coordinating solid diamonds and black line diamonds. I'm using Opal yarns for this, which are on the thin end of fingering yarns and the variegated yarn seems especially thin. I'm using a US 1, which I've never used for socks (I usually get 8 to 9 sts/inch using 2.75mm/US 2 or 2.5mm/US 1.5. The argyle is knit flat for the leg, so I'm using the only set of size 1 straights I have, which are very long. They're at least 14" long. I'm worried I'm going to bend them. Well, I'm worried I'm going to bend them more than they're already bent.
What do you think? I'm still not sure. I'll knit on it a bit longer and see what I think. If I don't like it by the time I get through knitting group tomorrow morning, I'll go buy another skein of Opal Uni. The biggest issue is when one of the solid colors is next to the same color in the adjoining diamond. On the straight rows, many of stripes are only a row long, but 67 stitches is a big percentage of a diamond. If it's a longer run of color, the percentage of the diamond is even more. On the left, the yellow solid is next to the "variegated" diamond, but you can barely see where one diamond ends and the other begins. What I may have to do is use the variegated yarn more strategically. Not allow a color that occurs in the solids to run for more than a few rows in the variegated diamonds, and in particular not let it run at the top or bottom diamond points.
Wednesday, April 04, 2007
O Canada!
Today was about as good as a knitting day could get. Knitting group in the morning, when I got home I watched the segment of Minnesota Showcase from this morning with guest the Yarn Harlot. Lots of close-ups of the Harlot knitting her traveling sock. In the afternoon TiVo recorded Cookie A on Knitty Gritty, and the final knitting goodness: The Yarn Harlot live in St. Paul, courtesy of The Yarnery in the evening.
Six of us drove to Eau Claire in September in my Eau de Dog minivan, but this! This was fabulous. Only twenty minutes from my house. Could the day get any better?
Yes. First, the Yarnery gave everyone a canvas tote bag. Nice and roomy, perfect for carrying around, say an Aran sweater knit in one piece. I found a seat, fairly close to the front and pulled out said Aran sweater. I exchanged pleasantries with the women on either side of me, and then shortly before door prizes were flung across the auditorium to various deserving knitters, someone came up behind the women to my right and flashed a skein of Fleece Artist yarn.
"Where did you get that?" I demanded. "I've been looking everywhere for Fleece Artist!" She pointed to the front of the room, where I had been aware a certain amount of commerce was taking place, but I somehow thought they were selling only the Harlot's latest book, which Amazon delivered to my doorstep two days before, so I hadn't bothered to go up and look. "Up there? They're selling Fleece Artist up THERE? " My heart soared, then sank. "Do you think there's any left?" They assured me that they had seen Yarnery women unpacking boxes and boxes...
I threw my Aran sweater to the floor and bolted over my seat to the front of the room and scored these two beauties, modeled here atop the tote bag.
A few minutes later we were instructed to pull out from our tote bags the lyrics to
Canada's national anthem. After first hearing the song in French (sung beautifully, I might add), a room full of knitters stood up as the Harlot peeked around the curtain and we all sang it together, in English.
Check it out
Six of us drove to Eau Claire in September in my Eau de Dog minivan, but this! This was fabulous. Only twenty minutes from my house. Could the day get any better?
Yes. First, the Yarnery gave everyone a canvas tote bag. Nice and roomy, perfect for carrying around, say an Aran sweater knit in one piece. I found a seat, fairly close to the front and pulled out said Aran sweater. I exchanged pleasantries with the women on either side of me, and then shortly before door prizes were flung across the auditorium to various deserving knitters, someone came up behind the women to my right and flashed a skein of Fleece Artist yarn.
"Where did you get that?" I demanded. "I've been looking everywhere for Fleece Artist!" She pointed to the front of the room, where I had been aware a certain amount of commerce was taking place, but I somehow thought they were selling only the Harlot's latest book, which Amazon delivered to my doorstep two days before, so I hadn't bothered to go up and look. "Up there? They're selling Fleece Artist up THERE? " My heart soared, then sank. "Do you think there's any left?" They assured me that they had seen Yarnery women unpacking boxes and boxes...
I threw my Aran sweater to the floor and bolted over my seat to the front of the room and scored these two beauties, modeled here atop the tote bag.
A few minutes later we were instructed to pull out from our tote bags the lyrics to
Canada's national anthem. After first hearing the song in French (sung beautifully, I might add), a room full of knitters stood up as the Harlot peeked around the curtain and we all sang it together, in English.
Check it out
Tuesday, April 03, 2007
Give me those ruby stitches
But first, let us rejoice in the silence of the house. The Longest Spring Break Ever is finally over. Doesn't 17 days seem like too much if you aren't at the beach for at least a week of that? Doesn't it seem even longer if the "break" you get is 24 hours at the Waterpark of America? My ears are still ringing from the noise bouncing off all that indoor waterparkiness. Plus, isn't it unfair that you can be in a hotel room at WoA with free wireless that you can connect to but not actually use?
I consoled myself by working on this:
It's my FLAK (Follow the Leader Aran Knitalong) sweater, out of its plastic box it's been in for the past 12 months. I'm trying to decide if I want to wish for a long, cold spring so that I can wear this thing before next fall. I'm about 3/4 of the way done with the front and about 1/3 done with the back (unless it's the other way around). The sleeve cuffs are torturing me. I tried to get creative with them and my punishment for that is ripping them out and re-knitting them again and again in the hope each time they will not act as attractive tourniquets rather than sweater cuffs. If I don't have a chance to wear it, maybe I'll enter it in the State Fair this year.
One problem I'm having is that my needles are the standard 12" long, which squishes the stitches a bit too much.
This sweater is designed to be knit in the round, but I hated knitting cables in the round as soon as I tried it, and hated it more the longer I stuck with it. I am a knitter of many talents: I can knit Continental, and prefer to do so in the round, but when cables are involved, forget it, because I can't manage the cable needle and tensioning the yarn in my left hand at the same time. When I knit flat, I anchor the right needle at the junction of my hip and thigh and throw the yarn with my right hand. I don't even tension my yarn through my fingers the way you're "supposed to." Here, look at this
See how I don't actually hold the right needle?
I'm particular about straight needles. I love my Aero needles, purchased while I lived overseas. They're wonderfully smooth and have nice, pointy tips. I can order a pair of 14" Aeros from Canada -- only $2.50 a pair -- but I have to pay something like $7 in shipping and for some reason I'm too cheap to do that, so I've been squishing the stitches.
Meanwhile, I got some good news Saturday. I got my re-submitted Level 1 swatch back and I have officially passed Master Hand Knitting Level 1. I promptly ordered Level II and got Fair Isle fever:
All three are new purchases. As I flipped through the books, I was reminded of the Shetland knitters, who knit with the assistance of a knitting belt into which they anchor their long, double-pointed needles. It's a speed knitting device, really, and I have often wished for such a device, not because I wish to knit faster (I'm pretty fast already), but because it serves the same purpose as my hip/thigh junction, while also allowing the knitter to knit in the round without puncture wounds to the hip/thigh. Even if I had a knitting belt, I wouldn't have the needles I'd need, as I've never seen DPNs longer than 8". I sighed and felt sorry for myself for a day or two until I realized that if anyone sold such a device, it would be Schoolhouse Press.
Look at this. (scroll to the bottom of the page). A knitting belt AND long DPNs. DPNs in the brand I love most (outside of Knit Picks). I realize that a $40 knitting belt and a $7 set of DPNs is more than a $2.50 pair of straight needles even when you do include postage from Canada, but that's not the point. The point is that I can get a knitting belt!
Subscribe to:
Posts (Atom)